Work with a Comparison View
Navigation Tree > Analytics > Comparisons > Selected Comparison
If you have created Comparisons, the Analytics > Comparisons entry in the Project Navigation Tree lists the Comparisons.
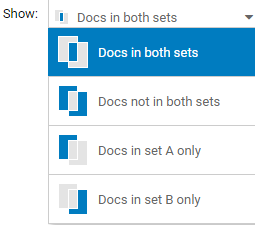
When you select a given Comparison, you can view or edit information about the Comparison, and you can examine which documents are common to both sets, which documents are different in the sets, which documents are in set A but not set B, or which documents are in set B but not set A.
A Comparison view is currently not a valid Search Target. When you select a Comparison view, the target will be Project Data.
Comparison View Summary
The Summary for a Comparison View contains the following:
- A breadcrumb that has the format Comparisons- <Comparison Name>
- Set A:<Name of Document Set A>, in which the name serves as a link to the view. For some views, such as Folders or Tags, you will see the appropriate icon and color before the name. For a search, you will see the search icon
 , along with the query.
 - Set B:<Name of Document Set B>, in which the name serves as a link to the view. For some views, such as Folders or Tags, you will see the appropriate icon and color before the name. For a search, you will see the search icon , along with the query.
-
 Edit — Enables you to edit the Comparison information, such as the name, description, and selection of Document Set A and Document Set B.
 - A
For example, Document Set A has 4 documents and Document Set B has 5 documents:
- 1 file is common to both sets
- 7 files are different (all files not common to both sets), the files are either just in Document Set A or just in Document Set B
- 3 files are in Document Set A but NOT Document Set B
- 4 files are NOT in Document Set A but are in Document Set B
Different Views of Documents
A selected Comparison list based on a Comparison view type supports the following
- All Docs — A general view of all documents depending on what you have in focus. You can double-click a document to open the Document Viewer either inline or in a new window.
- Communication Grid — This tab shows you a Communication Grid that helps you analyze the email communication for the current view and see how many emails were sent from a given email address to another email address. It shows the Top 50 email address FROM and TO combinations and lets you make grid selections.
- Domain Grid —This tab shows you a Domain Grid that helps you analyze the sending and receiving email domain information for the current view and see how many emails were sent from a given domain to another domain. It shows Top 50 FROM and TO domain combinations and lets you make grid selections.
- Email Threads — A view of all Email Threads.
- Short Message Threads — A view of all Short Message Threads.
- Reports — A view that shows you the appropriate reports.
- Clusters — A view that shows you the Clusters, or logical groups of your documents. The Clustering is for the documents in the current Comparison view type. Selecting the Clusters tab involves the Clustering process.
You can use the page controls (see The Workspace) at the bottom to navigate to different pages of the list.
A Loading message appears while documents are being loaded into a view. If you see the Loading message for a while, you may want to go to another view, perform other operations, and return to this view later.
Documents List Details
You can select documents by using one of the following:
View Family Documents in the List
You can also use the following icons to help you identify and view family and/or thread members in the Family/Thread column:
-
 identifies a document that is part of a family (message attachment group or document attachment group). You can click this icon to open the family inline.
 -
 identifies a document that is part of thread. You can click this icon to open the thread inline.
Document Information for Project Data-based Views
By default, the All Docs tab for a Comparison, which is a Project Data-based view, provides the following columns:
- Doc Number – A three-part number representing the Document Number in the format C.V.N, where C =A Data Collection (Data Set) number, unique per Organization, V =A Data Collection Checkpoint Value, unique per Data Collection, and N = A document number, unique within the Data Collection Checkpoint. When searching for a Document Number using the docnum metadata field, specify the entire value, since wildcards are not supported for this field. You can also use a range search. Example: docnum::[3.101.50000~~3.101.60000]. Family members (a parent and its children) have sequential document numbers.
- Family /Thread – Enables you to identify whether a document is part of a Family and/or Thread. For a family, the parent document and its family members are listed together. A parent document that has family members will provide the
 icon so that you can close the display of the entire family (and then click
  to open the family again). You can also open a Family in the Document Viewer by clicking the Family icon and you can open a Thread in the Document Viewer by clicking the Thread icon .
- Tags – This column displays Tags. Each Tag has a color assigned to it. Select a Tag from the list to apply it. You can see up to 3 individual Tags applied to a document in the Tag column. To see a complete list of Tags, you can hover over the
 icon, which shows you the full list of applied Tags. (To Tag using the complete list of Tags, use the Tag option listed in the document entry, or the Tag option from the toolbar.)
 - Name (always displayed) – This column displays key information about the file. The information displayed depends on the type of file:
- The icon
 indicates that the file is a document found on disk. If an Author is available, the author's name is identified, followed by the Filename of the document. Note that embedded documents extracted during import are assigned a filename in the format <parentfilename>_
OLE_<value>.<ext>. For example, for an Excel (xls) file that is the first OLE child linked to a Word document named spreadsheet.doc, the OLE filename would bespreadsheet.doc_OLE_1.xls. (Note that embedded images are not extracted during import, but are identified in theembeddedchildrenmetadata field with a value of image.) - The icon
 indicates that the file is an email. The sender of the email is identified in the From: field, followed by the Subject line of the email. This applies to email messages, calendar items, as well as journal entries and tasks.
 - The icon
 indicates a directory, if directories have not already been excluded from the Project Data. Your eDiscovery Administrator can take advantage of default exclusion queries in the Analytic Settings to exclude items such as directories, NIST files, and archive files from Project Data. If directories are included in the Project Data, then the Name: field identifies the name of the directory.
- The icon
-
A document's file extension will not always reflect the document's real file type. For example, a mydoc.txt file may actually be an MBOX from which emails are extracted. You can rely on the Digital Reef software to detect the correct file type, which you can verify in the document metadata.
- To – For emails, this is derived from the display name, if available (for example, Joe Jones), or the email address of the email sender and recipient (for example, jjones@someco.com). Each recipient is separated by a comma or semicolon, depending on the source data.
- Size – Shows the document size on disk.
- Date (default sort column for any non-result Project Data-based view, ascending order) – This column displays the primary date information based on the file type of the source file, displayed in the format YYYY-MM-DD HH:MM:SS. The date information is shown according to the Project time zone, either the default time zone of Coordinated Universal Time (UTC), or a time zone selected using the Project Preferences. The value in this field is propagated from parent files to their child files (and the children will have that primary date only, not their own). Date is the default sort column for all Project Data-based views except results views, Cluster views, shown export-related views, and it enables you to see families grouped. This field displays information associated with the
dateprimaryfield, which determines the primary date as follows (in order of precedence):- For eDocs – The primary date is selected by checking the following fields, in this order:
1. datemodified2. lastmodifiedtime3. datecreated4. createdtime5. dateaccessed- For email messages – The primary date is selected by checking the following fields, in this order:
1. sent2. received3. datecreated- For the non-email Message class (for example, Calendar items) – The primary date is selected by checking the following fields, in this order:
1. sent2. received3. datestarted4. datemodified5. lastmodifiedtime6. datecreated7. createdtime
Optional Columns:
The following columns are hidden by default for a Project Data-based view such as a Comparison, but you can change your column selections to display them, and you can change the column order by dragging a column to the desired position:
- Sent (optional field to display in Project Data-based views) – The sent display date for emails (for example, Tue, 23 Nov 1999 18:45:28 +0000). You can sort on this column in order to see families grouped. To search by sent, you must use the format YYYY-MM-DD-HH-MM-SS.
- Received (optional field to display in Project Data-based views) – The received date for emails in the format YYYY-MM-DD HH:MM. You can sort on this column in order to see families grouped.
When you change column selections and/or position for a view, your current selections are retained for that type of view for the duration of your session. This enables you to keep your column preferences for a given view type in effect as you navigate to different places in the application. For example, if you make column selection and/or position changes for a Project Data-based view such as a Comparison, you can open the Document Viewer and see those selections, then close the Viewer and still see your Comparison selections. Your selections are maintained whenever you switch from one view to another view of the same type (for example, you switch from a Comparison to a Custodian view), even if you move to another type of view in between. For example, if you change column selections and positions for a Project Data-based view such as a Comparison, then move to a Data Set view (which shows its column selections), and then move to another Project Data-based view (such as a Custodian, Tag, or Folder view), you would still see your Project Data-based column selections and positions.
Document Menu Options
Once you select one or more documents, use the Document drop-down menu to see a list of options available for a non-result view of Project Data. These options are available based on permissions.
For a list of options that apply to or require an entire view, use the right-click options for the Project Data-based view in the Navigation Tree.
For operations that require you to select a target Folder or other view, be aware that the available target options change based on your context. For example, if you are removing documents from a Folder, you cannot create a new Folder.
-
 Add Tags – Launches the Tag dialog, from which you can select Tags to apply. You can also create a Tag and use it right away.
 -
 Remove Tags – Launches the Tag dialog, from which you can select Tags to remove.
 -
 Add to – Enables you to add documents to a selected
 -
 Remove from – Removes documents from the selected
 -
 Remove from Project Data - Removes the selected documents from Project Data entirely, including the Discard Pile, if the selected documents reside there. A Work Basket task called
 Removing Documents from Project Datareports the results. Documents removed from Project Data/Discard Pile are still available in the appropriate Data Set in the Project, in the event that you need to add them to Project Data again, but the documents no longer have Project Data information that was previously applied, such as Tags. -
Find More Like These – Uses a selected set of documents/emails in the current folder or search results, selected documents, or an entire page of documents as comparison criteria to search for similar content. This type of search finds documents that have the most content similarity to the documents submitted as the focus of the search. It assesses whole-document similarity and reports a Score and %Terms match.
-
 Download as PDF – Enables you to download a single document, multiple selected documents on a page, or all documents in a Cluster or Subcluster as a PDF to your local environment so that you can view the documents in PDF format. When you select this operation, you can select the Stamp Document Number option if you want to include a stamp with the document number (
docnum) on the bottom right of each page in the PDF. If you select the top checkbox to save all documents as PDFs, you will see a Warning popup that states the following:You are attempting to download all documents in this list as PDFs. Depending on the size of the documents, this could take considerable time and/or render the browser unresponsive. Consider creating a new export stream to produce the PDFs directly to an export location instead.At this point, you must either confirm the operation by clicking Continue, or click Cancel instead. Whether you select one, multiple, or all documents to download, the software will prepare a ZIP file, by default named <projectname>_PDFs.zip. An information popup indicates that the PDFs are being prepared for downloading, and once finished, the archive (ZIP) can be downloaded from the Work Basket. Note that certain file types are ignored for PDF generation, including any selected directory folders not removed from your Project during setup by your administrator, disk images, file archives, mail archives, empty files, and files for which the native is not available. A WARNING_DETAILS_REPORT.csv file identifying the files that were skipped or failed PDF generation can be downloaded from the appropriate PDF-related Work Basket task. See About Downloading Documents as PDFs and Natives for more information. -

You are attempting to download all natives in this list. Depending on the size of the documents, this could take considerable time and/or render the browser unresponsive. Consider creating a new export stream to produce the natives directly to an export location instead.At this point, you must either confirm the operation by clicking Continue, or click Cancel instead. Whether you select one, multiple, or all documents to download, the software will prepare a ZIP file, by default named <projectname>_Documents.zip. An information popup indicates that the documents are being prepared for downloading, and once finished, the archive (ZIP) can be downloaded from the Work Basket.
-
 Send to Discard Pile – Removes the selected documents from Project Data and places a copy in the Discard Pile. A Work Basket task called
 Sending Documents to Discard Pilereports the results. Documents removed from Project Data can later be restored with their Project Data information (for example, Tags).
If you see a CAE_ERROR with a description of PAGE_JOB:null, ask your System Administrator to check your NAS storage timing. If the NAS timing is off, you may see this error when generating certain document lists that rely on the availability of created files (for example, if you try to use View Exceptions for a data set after Project Data is populated).
Create Manifest Button for the Comparison View
From the toolbar located above the document list for a Comparison view, you can click the following button to generate a manifest:
-
 Create Manifest... – Enables you to use the Create Manifest dialog to generate a manifest based on your current Comparison List (for example, Docs in both sets). For the manifest of the current Comparison List, you can generate a CSV or XML manifest, using either the current fields or all fields. From the Work Basket task for the manifest generation, you can then right-click and select
  Download to download the file to a destination local to your computer. Users with Connector Access permissions can also save the manifest to a server location. For download of a large manifest file (over 200 MB), the software places the manifest in a ZIP file, which you can then unzip. Note that this process can take time.
Selected Document Options
When you select a single document in a Project Data-based list and right-click (or use the click the ellipses at the far right), a document context menu appears with a list of options:
-
Open Document Inline – Launches the Document Viewer inline, within your current browser window.
-
Open Document in New Window – Launches the Document Viewer in a new browser window (or tab, depending on your browser options). This enables you to select any document in the paged Document List and see the full content of that document (or other views, such as Metadata or History). You can also launch multiple windows for different documents to perform side-by-side reviews of multiple documents. When you open the Document Viewer in a new browser window, you can select view modes in the top center portion of the screen, navigate documents by using the page controls at the bottom, and perform operations such as tagging.
-
Open Family Inline – Launches a Family-specific view of the Document Viewer for a given Family (MAG or DAG) inline, within your current browser window.
-
Open Family in New Window – Launches the Document Viewer for a Family (MAG or DAG) in a new browser window (or tab). This enables you to focus on the other family members of a selected parent email/document or email or embedded attachment. Family members are indented under their parent. MAGs are sorted by the email sent date.
-
Open Thread Inline – Launches a Thread-specific view of the Document Viewer inline, within your current browser window.
-
Open Thread in New Window – Launches a Thread-specific view of the Document Viewer in a new browser window (or tab). This enables you to focus on each message in the Thread and the associated attachments, if applicable.
-
 Find Exact Duplicates of This... – Searches for documents that have exactly the same content and metadata as the selected document. An exact duplicate would have the same file MD5 value.
 -
Find Content Duplications of This... – Searches for documents that have the same content as the selected document.
- Find Near Duplicates of This... – Searches for documents whose content is almost the same as a selected document. Evaluation of what constitutes a near-duplicate document includes comparison of the overall term length, but not file type or format. A Threshold setting enables you to specify the level of content match for the operation. Find Near Duplicates minimally requires an Analytic Index.